What do You Need to Know About Grunt: The JavaScript Task Runner?


Grunt is a popular javascript task runner and is mainly used in server side scripting files such as Nodejs.
Task runner is mainly used for performing repetitive tasks such as minification of js and css files, linting js file for errors, compiling the css files and watching for changes in the files.
Let’s get started.
1. Install nodejs
Install the latest and stable version of node js and npm. The code to install nodejs and npm in ubuntu 12.10 is shown below:
sudo apt-get install -y python-software-properties python g++ make sudo add-apt-repository ppa:chris-lea/node.js sudo apt-get update sudo apt-get install nodejs sudo npm install npm -g
Then, create a node js project with express framework. For that, first we have to create a directory for our project.
mkdir grunt_app cd grunt_app
Next we have to create a package.json file, The package.json file contains the packages used in our project along with the package version. Use the following command to create a package.json file using the command line.
npm init
Here is the example of a package.json file created using npm init :
{ "name": "grunt_app", "version": "1.0.0", "description": "test app for grunt task runner", "main": "Gruntfile.js", "dependencies": { "grunt": "^0.4.5", "express": "^4.13.3", }, "devDependencies": {}, "scripts": { "test": "echo \"Error: no test specified\" && exit 1" }, "author": "", "license": "ISC" }
Then we have to install the express framework in our project and have to save the dependencies
npm install express --save
2. Install Grunt CLI
The grunt Command Line Interface(CLI) is used to access the grunt command in our project.
npm install -g grunt-cli
3. Gruntfile.js
Grunt CLI alone cannot install the grunt task runner. In order to use grunt task runner we have to create grunt file in our root directory
module.exports = function(grunt){ grunt.initConfig({ pkg:grunt.file.readJSON('package.json'), uglify:{ options:{ banner:'/*! <%=pkg.name %> <%= grunt.template.today("yyyy-mm-dd") %> */\n' }, build:{ src:'src/<%= pkg.name %>.js', dest:'build/<%= pkg.name %>.min.js’ } }, jshint: { files: ['Gruntfile.js', 'src/**/*.js', 'test/**/*.js'], options: { globals: { jQuery: true } } }, watch: { files: ['<%= jshint.files %>'], tasks: ['jshint'] } }); // Load the plugin grunt.loadNpmTasks('grunt-contrib-uglify'); grunt.loadNpmTasks('grunt-contrib-jshint'); grunt.loadNpmTasks('grunt-contrib-watch'); // Default task(s). grunt.registerTask('default', ['uglify','jshint']); }
we have to initialize the configuration object using grunt.initConfig() function.Then we have to read the project settings using package.json file.
Then we can use the grunt plugins to perform the various tasks.
Uglify plugin is used for javascript minification and jshint tool is used to detect errors and problems in javascript code. Atlast, the watch plugin is used to run the specified task
when there occurs a change in the specified file
Finally we have to load the grunt plugins we are used
grunt.loadNpmTasks('plugin-name');
And Finally we have to register the default task using
grunt.registerTask(‘default’);
4. Run Grunt
Ultimately we can run our project using the command:
grunt
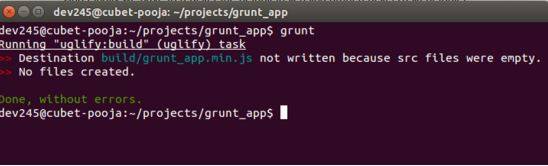
This is an example of a basic grunt file with minimum grunt plugins.Thus, Grunt is an amazing tool which help us immensely with the development and workflow of our application.


Get in touch
Kickstart your project
with a free discovery session
Describe your idea, we explore, advise, and provide a detailed plan.


