An Introduction to Hapijs- Part 2

As promised, I’m continuing with my blog on hapijs introduction. On this session, we will start by testing the API with some API client. Hapi has its own api testing client Hapi-swagger. We have installed it and registered it in app.js. So shall we use that?.
Eventhough we installed (package.json) , included and registered(app.js) Hapi-swager , it is not fully ready to use. Because Hapi-swager has no idea on which all routes should be handled by them.
Inorder to inform Hapi-swager to use our adduser.js, just add a tags:[‘api’] in config portion of the adduser.js file. Go back to adduser.js and find that line. By this we are informing Hapi-swager that use this adduser route as api.
Since we have done some changes in our js file Run
$ node app.js
Lets browse http://localhost:3000/documentation we can see the Hapi swagger UI where we can test our adduser post api.
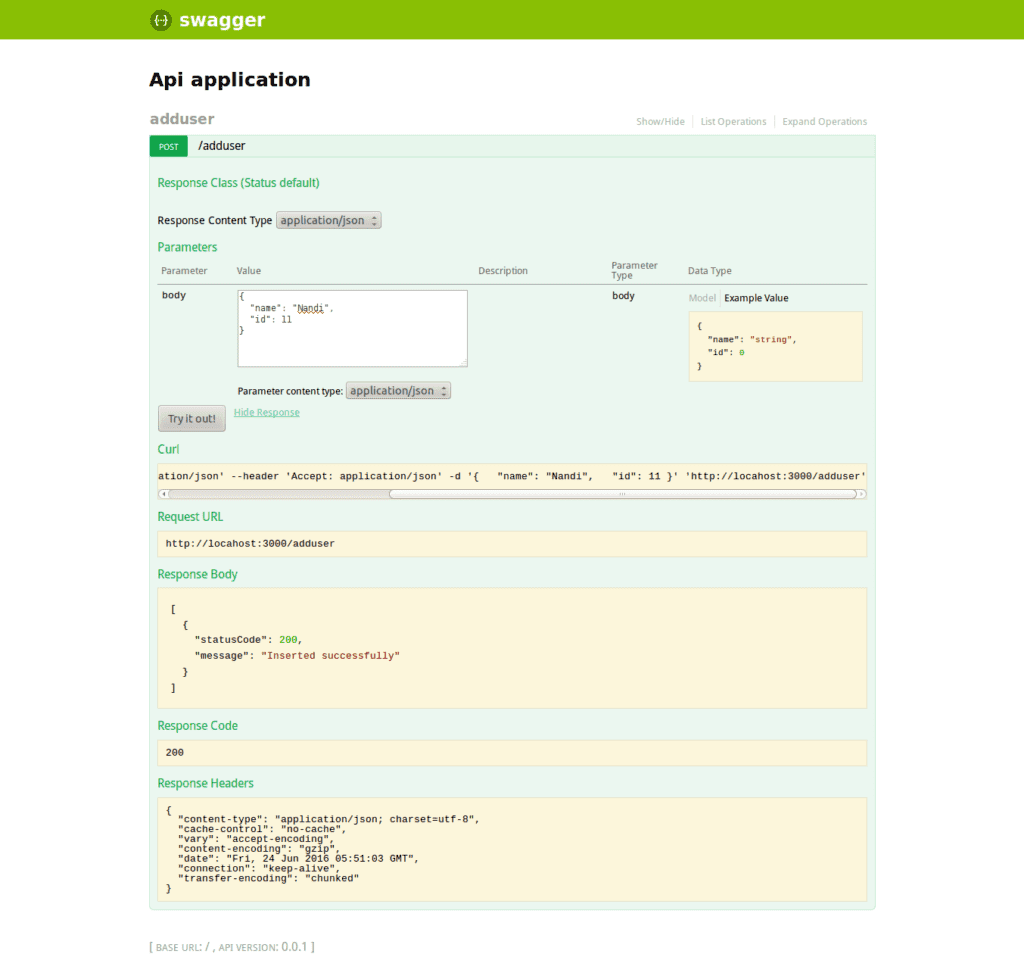
Now, check your apiuser database for the new value. We can see our table updated with new values. You also have the freedom to test JOI module here. Try to add invalid values to name and id to check how api responds.
8: Be More Structural : Controllers and Models
We can now examine how to implement controllers and models. Calling controllers from routes. We can arrange our routes codes in more professional way. Lets first see how to implement controllers. Create a controllers folder in our root folder and create a addusercontroller.js file inside that. Shall we create a models folder and a addusermodel.js file inside that now itself? Ok lets do it.
Now, add some codes for addusercontroller. Keep in mind that we are going to create a controller that can aid the routes in its functionality.
addusercontroller.js
'use strict'; const db = require('../database.js'); // include the database file and get the db object const Joi = require('joi');//include the joi module for validation //this is something similar to a constructor. function addUserController() { } //we create a new function addUsers addUserController.prototype.addUsers = function(request,reply) { var post = {name:request.payload.name,id:request.payload.id}; db.connection.query( 'INSERT INTO apiuser set?',post, function(err, rows) { reply([{ statusCode: 200, message: 'Inserted successfully', }]); if(err) { throw new Error(err) } } ) } module.exports = addUserController;
Here, observe the code portion for addUsers function . You can see the same code that we have used in adduser.js router. What we have done here is we created a controller and placed the handler function code in router to this. module.exports will complete the contoller creation.
Now, we have created a new controller that can be the router to make more structural. Then, lets see how to call this controller in adduser.js router. Open adduser.js router file and modify as follows.
adduser.js
Var addContl = require('../controllers/addusercontroller.js); // include our new controller exports.register = function(server,options,next) { var addContlObj = new addContl(); // create an object for the new controller. server.route([{ method: 'POST', path: '/adduser', config: { tags : ['api'], // let it be here for now. I will explain it later in this blog // We use Joi plugin to validate request validate: { payload: { // Both name and id are required fields name: Joi.string().required(), id: Joi.number().required() } } }, handler: addContlObj. addUsers// see here we removed a lot of codes and simply handed over that to our new controller function addUsers }]); next(); }; exports.register.attributes = { name :'adduser-route', version : '0.0.1' };
Thus by including the controller on routes we acheived a structured format for our app
Since we have done some changes in our js file Run
$ node app.js
Now its time for a model. In our previous section we examined how a controller helps a router. Now, lets see how a model helps a controller. Lets open the addusermodel.js in model folder and have the following codes in that.
addusermodel.js
'use strict'; const db = require('../database.js'); // include the database file and get the db object const Joi = require('joi');//include the joi module for validation //this is something similar to a constructor. function addUserModel() { } //we create a new function saveData addUserModel.prototype.saveData = function(palyloadData) { var post = {name:palyloadData .name,id:palyloadData .id}; db.connection.query( 'INSERT INTO apiuser set?',post, function(err, rows) { if(err) { throw new Error(err) } } ) } module.exports = addUserModel;
Here we can see we have simply moved some codes from controller to model file. So obviously we need some changes for our addusercontroller.js file. So lets modify our addusercontroller.js as follows.
addusercontroller.js
'use strict'; Var addModl = require('../models/addusermodel.js); // include our new model //this is something similar to a constructor. function addUserController() { } //we create a new function addUsers addUserController.prototype.addUsers = function(request,reply) { var addModlObj = new addModl(); // our model object var result = addModlObj.saveData(request.payload); // call the model function reply(result); } module.exports = addUserController;
Thats all . Now we have all our basic folders and files.
Since we have done some changes in our js file Run
$ node app.js
Note : After each edit in any of the js file, inorder to reflect that in output, run the node command. Afer the configuration of Hapi-swagger, we have the freedom to test our implementation using that.
Hapi and be happy
By this, I hope you have got a basic idea on Hapi/ joi/swagger/mysql etc. Thats it . Now go and explore more on Hapi and be happy. Thanks.


Get in touch
Kickstart your project
with a free discovery session
Describe your idea, we explore, advise, and provide a detailed plan.


