Passport.JS Authentication for your Node.JS Sleek Application
Node JS is one of the software platforms, formulated to support scalable server side and networking applications. Node JS applications, by utilizing non-blocking I/O as well as asynchronous events increases the throughput and efficiency to the core. There are several boons to Node JS applications. For instance, Node JS application in conjunction with JSON, a browser, and a document DB like Mongo DB caters a unified JavaScript development stack. Node JS based authentication and login can be a multifaceted task as it is with any other applications. Authenticating Node JS using Passport has been proved to be an effective strategy in the recent past. In this post, we will see how such an authentication process can be carried out with package Passport.
Brief introduction to Passport
Passport is a recognized middleware for Node JS authentication. The package Passport is uniquely formulated for the purpose of authenticating requests. It supports encapsulation during code creation by delegating all the other functionality to the application. Such an aspect plays a crucial role in keeping the code clean and maintainable.
Passport has libraries for common social networks like facebook, google , twitter, linkedIn etc. In order to setup a social login with passport, you need to obtain the developer keys from respective sites. It is also capable of recognizing inimitable authentication requirements of each application. Solutions to such requests are catered with the help of strategies that are usually packaged as individual modules. Some of the commonly used Passport authentication strategies are listed below.
– passport-local
– passport-facebook
– passport-google-oauth
– passport-twitter
– passport-linkedin
Setting-up the api keys, and routes for facebook and twitter are demonstrated below.
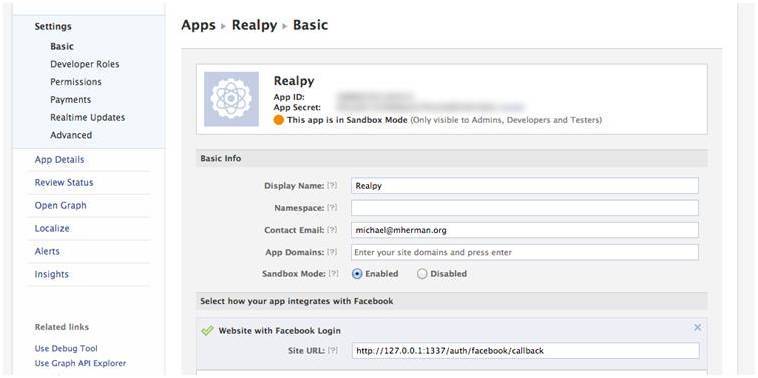
Stepwise creation of developer keys in Facebook.
Stepwise creation of developer keys in Twitter.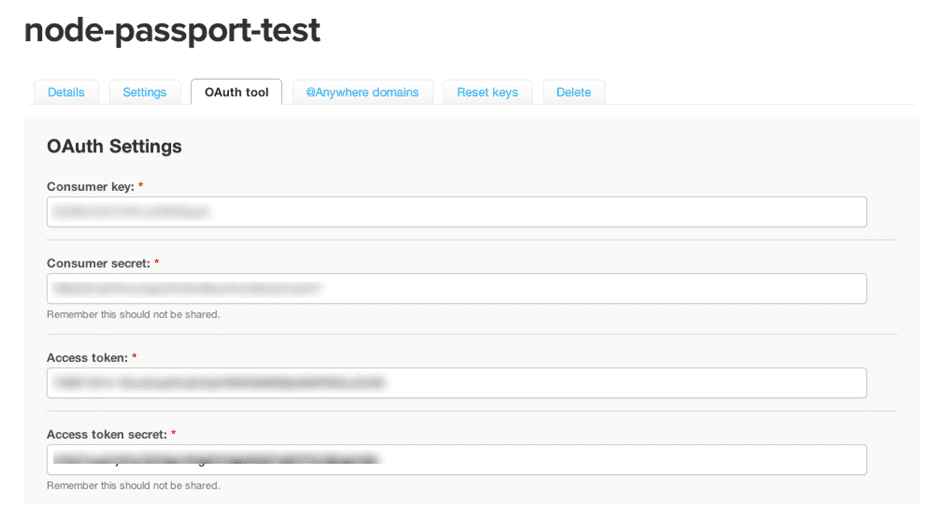
We could easily choose the package of authentication by making some minute changes in the code. For instance, the code used for choosing local passport authentication will look like:
app.post (‘/login’, passport.authenticate(‘local’, { successRedirect: ‘/’,
failureRedirect: ‘/login’ }));
Local Passport.JS authentication of Node.JS can be easily studied by skimming through the steps listed below. The following code should work perfectly with the latest version of sleek.js.
1. First of all you should install passport & passport-local,
Then require passport in app.js and modify it in the following format
var passport = require(‘passport’);
…
…
app.configure(function(){
…
app.use(express.session());
app.use(express.static(path.join(__dirname, ‘public’)));
app.use(passport.initialize());//use passport after express.session.
app.use(passport.session());
});
2. Create a passport.js file in your ‘lib’ folder and write your configuration strategy for example:
var passport = require(‘passport’);
passport.serializeUser(function(user, done) {
done(null, user);
});
passport.deserializeUser(function(obj, done) {
done(null, obj);
});
var LocalStrategy = require(‘passport-local’).Strategy;
passport.use(new LocalStrategy(
function(username,password,done) {
console.log(username)
if (username!=’abc’) {
return done(null, false);
}
else{
return done(null, true);
}
}
));
3. Include this file by updating application/config/config.js file like below
global.sleekConfig.configLibs = [‘passport’];
4. Add the route like this in your ‘application/config/routes.js’ or you can add the function as commonRouteFunction
{route: ‘/logincheck’, controller: ‘index’, action:’logincheck’,type:”POST”,fn:[‘checkPassport’]}
5. You should write the passport authentication function in the route helper in ‘application/helpers/roues.js’, inorder to call the function as a middleware. for example,
var passport = require(‘passport’);
var routeHelper = {
checkPassport:
passport.authenticate(‘local’, { successRedirect: ‘/success’,
failureRedirect: ‘/login’ })
}
module.exports = routeHelper;
Here we have literally formulated a new application that will enable user to register and login as per the norms set by the developer. The application will also support flash messages and hashing password. One of the other unique features of this type of application is that we could literally filter the traffic to certain sections/pages in our site that utilizes route middleware by means of username and password.
I hope this post clearly depicts the local Passport JS authentication process of Node JS Sleek application. I will strike again soon with another post on passport authentication of Facebook, Twitter and Google.
- Share this